
How to deploy your application to AWS Elastic Beanstalk | AWS Elastic Beanstalk Survival Guide
A beginner guide to effectively deploy and manage application on AWS with Elastic Beanstalk
Chapter 3
In this chapter, we will be learning to deploy application to AWS Cloud with Elastic Beanstalk. We are assuming that there are at least two different environment version that you will need to deploy - staging and production.
There will be two deployment scenarios that we are going through:
- Deploying two different environments inside the same Elastic Beanstalk Application.
- Deploying two different environments to two different AWS account.
For most of the time, we will be encountering the first scenario. However, you might be doing development work for your client and your staging environment is deployed under your personal AWS account. However, your client wants the production environment to be deployed under his/her AWS account for billing purposes. This is where we will encounter the second scenario.
Note: Please ensure that eb cli tool is installed before we start.
Deploying two different environments inside the same Elastic Beanstalk Application
Let’s create an Elastic Beanstalk Application
- Boot up your favourite terminal and navigate to your project root directory.
- Type
eb init - For
Application Nameprompt, enterhelloeb
We will be configuring:
- Default region. This is where you want your EC2 location to be. Choose the one nearest to your target audience(People using your web application)
- AWS Security Credentials.
- EB Application Name
- Choice of Programming Language or Framework that your application is using
Now, let's check whether our Elastic Beanstalk Application was created.
- Type
eb console - Elastic Beanstalk management console should open in our browser and this is what we should see:

At this point of time, we have created an empty folder. Let’s deploy our staging version of our application.
Deploy staging environment
- Type
eb create - For environment name prompt, enter
helloeb-staging. You can name it in whatever way you want but make sure you can differentiate between environments
We will be configuring:
- Environment Name
- DNS CNAME Prefix. This determines the prefix naming for your application. [DNS-CNAME-PREFIX].elasticbeanstalk.com
Once the configurations are done, your application will be automatically uploaded to the environment.
Deploy production environment
- Type
eb create - For environment name prompt, enter
helloeb-production.
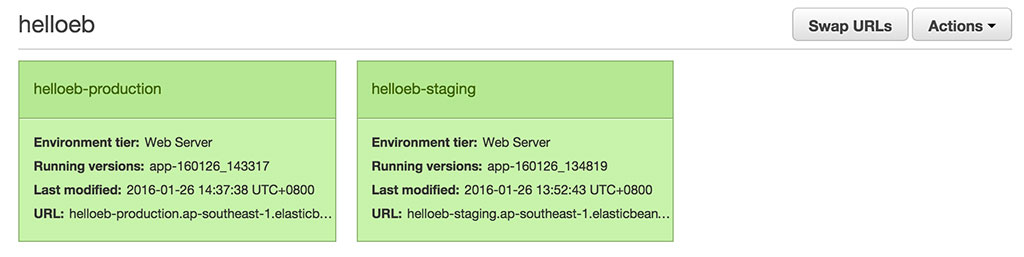
Let’s check whether both environments are created.
- Type
eb console - Check that both environments are created in the management console under the Application
helloeb. Ensure that both of them are in green health status too.
Take note:
- When we create environment via the eb cli, the environment created are by default auto-scale, load-balanced environment.
- The default instance type is t2.micro.
These settings are adjustable to our own preference. We will be touching on these configuration in the next chapter.
Switching between staging and production environment
To switch between staging and production environment, we will be using eb use {{env-name}}.
// Switching and deploying to staging
eb use helloeb-staging
eb deploy

// Switching and deploying to production
eb use helloeb-production
eb deploy
If you are constantly switching between both environment, it is best that we use a simple shell script to get the job done.
// Filename: deploystaging.bash
#!/bin/bash

eb use meclub-staging
eb list
eb deploy
Take note: You will need to change the permission of the file to make it executable
chmod 700 deploystaging.bash

// Execute script
./deploystaging.bash
Deploying two different environments to two different AWS accounts
This scenario is slightly tricky because the AWS accounts are different. Consequently, the AWS security credentials are different. Let’s create two different credential profile with the AWS cli tool aws.
// Create a staging credential profile
aws configure --profile staging

// Create a production credential profile
aws configure --profile production
To check that we have created the security profile, navigate to ~/.aws. We can see that our profiles created in the credentials file.

Switching between staging and production application
To switch between staging and production application, we will be using eb init {{application-name}} --profile staging/production.
// Switch to staging application
eb init helloeb --profile staging

// Switch to production application
aws configure --profile production
Take note: The above command will set the current application folder and its default environment. To switch environment within the application, use eb use {{env-name}}
Similarly, let's have a shell script to reduce verbosity of deployment
// Filename: deploystaging.bash
#!/bin/bash

eb init helloeb --profile staging
eb use helloeb-staging
eb list
eb deploy
Conclusion
After deployment, we need to fine-tune the environment to suit different environment's needs. I hope this chapter is helpful to you, let's look forward to chapter 4.
Interested in this AWS Elastic Beanstalk Survival Guide Series, remember to subscribe below for updates
Elastic Beanstalk Survival Guide: Table Of Content
- Chapter 1: Introduction
- Chapter 2: Getting Started
- Chapter 3: How to deploy application on AWS Elastic Beanstalk
- Chapter 4: How to configure AWS Elastic Beanstalk to scale
- Chapter 5: How to map custom domain name for AWS Elastic Beanstalk
- Chapter 6: How to configure SSL for AWS Elastic Beanstalk
- Chapter 7: How to configure a Worker Environment for AWS Elastic Beanstalk
