How to configure a Worker Environment for AWS Elastic Beanstalk | AWS Elastic Beanstalk Survival Guide
A beginner guide to effectively deploy and manage application on AWS with Elastic Beanstalk
What is a worker?
A worker is a separate background process that assists your application in handling blocking, resource-intensive or time-intensive operations.
Some examples of such operations:
- sending email via third-party service
- reading/writing large files
- complex algorithmic calculations
Why do you need workers?
When an application handles requests that take too long to complete, it slows down the overall performance of the application. By passing off heavy-duty operations to the worker, the application can remain responsive and can take more requests.
I can spawn a new process in the same instance right? Why do we need a separate instance?
If the worker and web server lives in the same instance, a web server can still be overwhelm by background tasks that are resource intensive. This negates the purpose of having a worker.
However with a Worker Environment, it allows your Web Server Environment to remain responsive under load because operations are delegated to their own instance.
How to communicate between environments?
To communicate between Web Server environment and Worker environment, we use a message queuing service by AWS call Amazon Simple Queue Service (SQS).
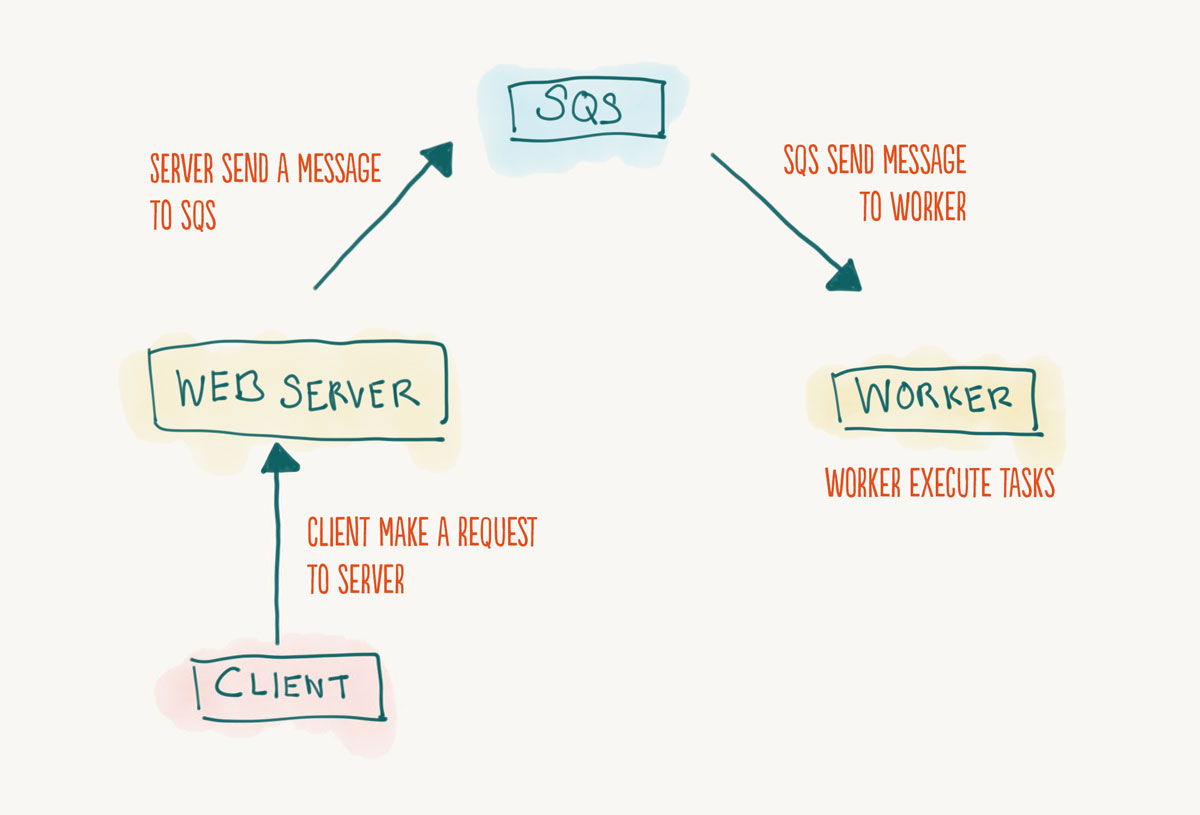 Flow from client to worker
Let's first create a queue in SQS.
Creating a Queue in SQS
The process of creating a new queue in SQS is fairly simple.
Go to SQS management console and click on “Create New Queue"
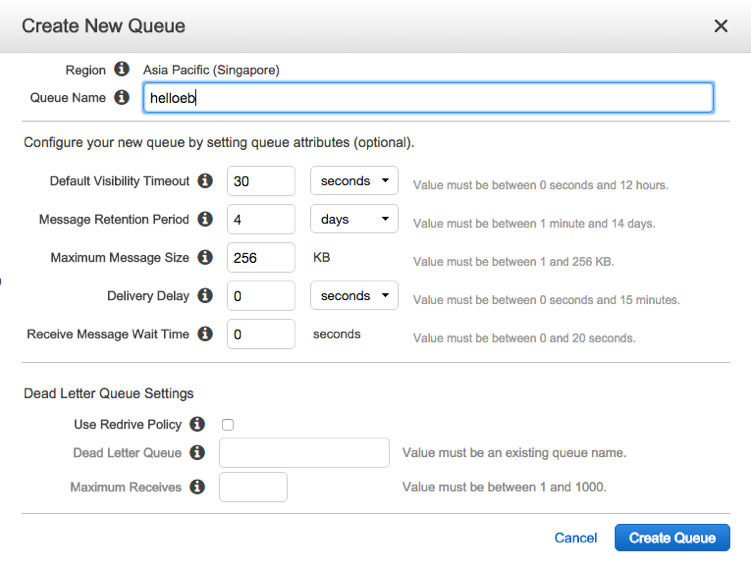
- Enter a name for your queue. Leave the rest of the options as default.
Click
Create Queueand your newly created queue will appear on the SQS management console.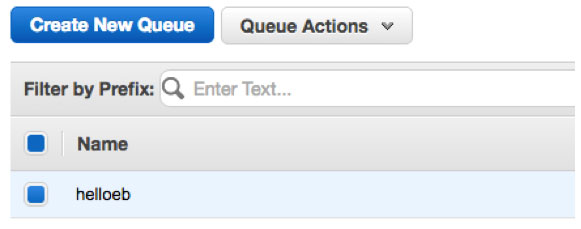
Creating Worker Environment
- Open your terminal and navigate to your project root.
- Assuming that you have followed the steps in the previous chapters, you should have already created an application and the web server environment. Use the command
eb listto confirm this. - Type
eb create -t worker - For environment name prompt, enter
helloeb-worker. Make sure you name it in a way that you can differentiate between environments.
To confirm that the new worker environment have been created:
- Type
eb console - Check that the new worker environment have been created in the management console under the Application
helloeb. Ensure that it’s in green health status too.
Take note:
- As is the case in Chapter 3, when we create environment via the eb cli, the environment created are by default auto-scale, load-balanced environment.
- It will also come with a default auto-generated queue.
- The default instance type is t2.micro.
Configuring Worker Environment
- From the application management console, click on your worker environment then click on
Configuration. - Click on the ‘gear icon’ for
Worker Configuration. - Under
Worker queue, select the SQS queue you have created earlier.
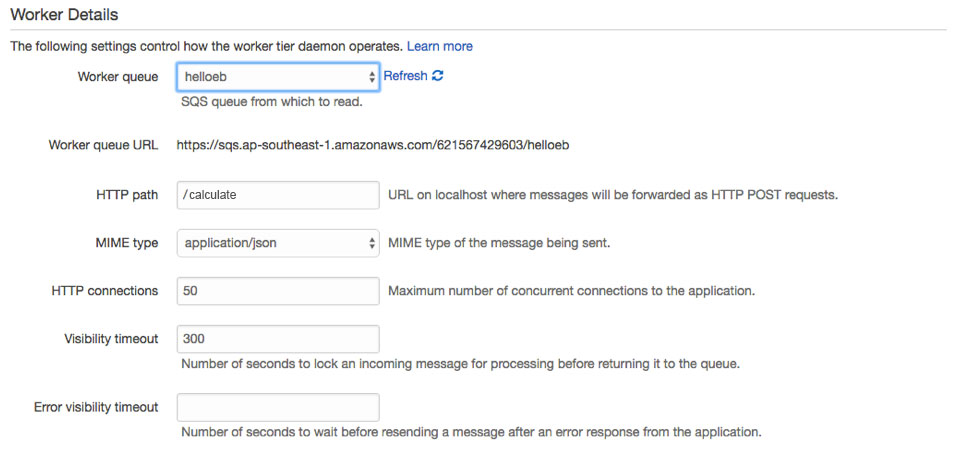
Take note of two things in this page:
Worker Queue URL
This is the url that your application calls to send messages to the queue.
HTTP Path
Your HTTP path will be where your application handles messages from the queue. It accepts a POST request with the specified MIME type.
How to send messages to worker environment
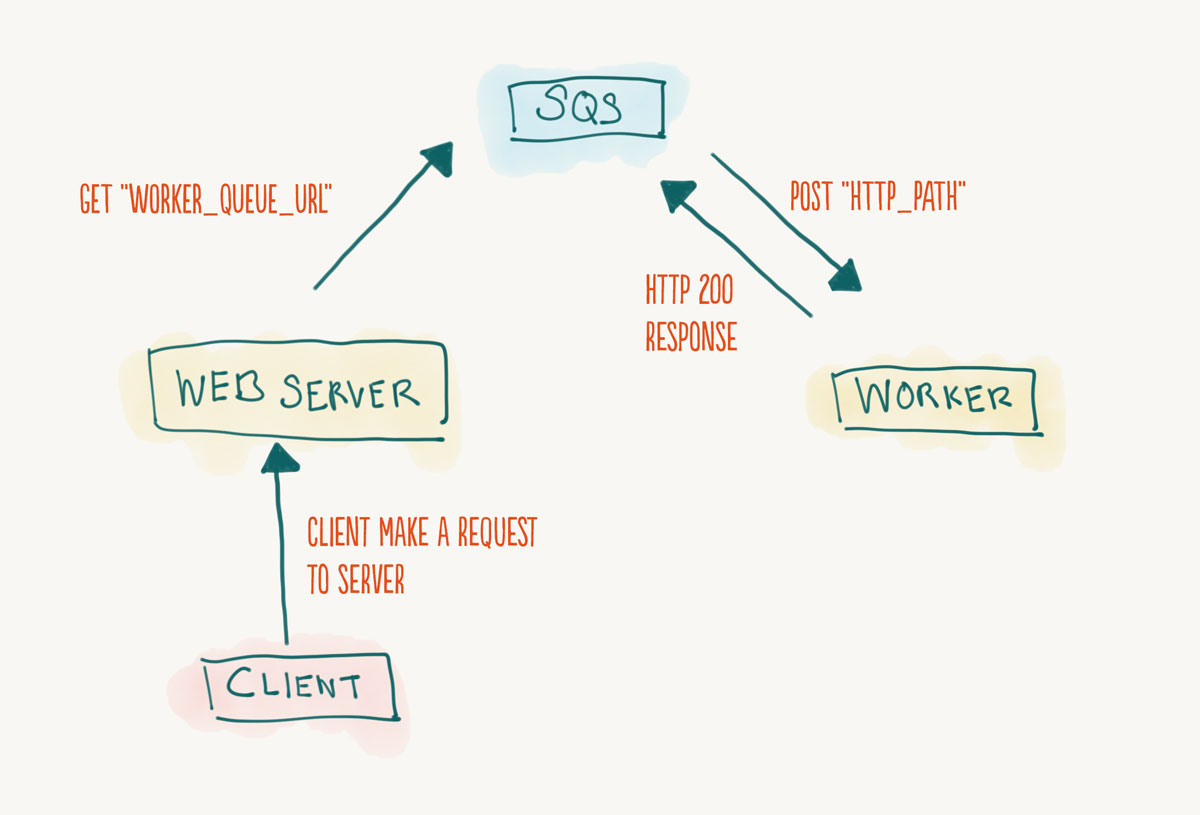 Use AWS SDK of your platform choice to send messages to SQS
- When server receives request from client, it determines whether it should pass this task to worker.
- If it's passing the task to the worker, it will send a message with a
GETrequest to the SQS url. Use the AWS SDK of your platform choice to accomplish this. - The message will be stored in the SQS’s queue
- Based on the queue's priority, SQS will send the message via a
POSTrequest to the HTTP Path of the worker environment. - The worker receives the message and executes accordingly. It should return a
HTTP 200response after the operation is done. - SQS will wait for a
HTTP 200response to delete the message in the queue. If it fails to receive that status within the predefined limit, it will continuously retry sending the messages.
Manual Query
You may also manually query the queue using the AWS SDK to retrieve new messages.
However do take note that you must not manually set any queue in this Worker Details configuration as the queue will lock all messages that it has sent to HTTP path. This will disallow AWS SDK from retrieving messages from it.
Look into the AWS SDK documentation for more details.
Take note:
- Since you’re already on the
Configurationpage, now might be a good time to change your instance settings to ‘single-instance’ if you’re not running a production environment. - Querying the queue manually means that your worker must also manually manage queue messages. e.g.: message delete, message query retries, message locking etc.
Interested in this AWS Elastic Beanstalk Survival Guide Series, remember to subscribe below for updates
Elastic Beanstalk Survival Guide: Table Of Content
- Chapter 1: Introduction
- Chapter 2: Getting Started
- Chapter 3: How to deploy application on AWS Elastic Beanstalk
- Chapter 4: How to configure AWS Elastic Beanstalk to scale
- Chapter 5: How to map custom domain name for AWS Elastic Beanstalk
- Chapter 6: How to configure SSL for AWS Elastic Beanstalk
- Chapter 7: How to configure a Worker Environment for AWS Elastic Beanstalk
